# Windows Server 2016 - Active Directory Lab Build
## How to Build an Active Directory Lab
Sean Nanty (z3tssu)Nov 7, 20248 min read
Hello, my name is Sean Nanty and below is my notes on how to setup an Active Directory Lab, including how to setup the Windows Server Domain Controller, Setting up two Windows 10 machines, setting up users, groups and policies and finally joining these machines to the domain.
## Lab Overview and Requirements
### Lab Setup Overview
#### Lab Components:
* **Machines:**
* 1 Windows Server 2019
* 2 Windows 10 Enterprise machines
* 1 Kali Linux machine (attack machine)
*
```
```
#### System Requirements:
* **Disk Space:** 60 GB minimum
* **RAM:**
* **Minimum:** 16 GB total for the lab
* **Recommended:** 32 GB for optimal performance
* **Per Machine Allocation:**
* 2 GB RAM for each virtual machine (Windows Server, Windows 10 instances, and Kali Linux)
* 8 GB total for VMs, plus RAM for base OS
#### Tips for Lower Specs:
* If 16 GB RAM is unavailable, it's still beneficial to follow along, take notes, and practice with the tools as much as possible.
* Additional resources:
* Some exercises may utilize Hack the Box machines for hands-on practice.
#### Recommendations:
* **Building a Lab:** Ideal for users meeting hardware requirements to build and understand the lab environment.
* **Alternative Hardware:** Purchasing a low-cost server (e.g., from eBay) to meet lab requirements is an option.
* **Engagement:** Even without full specs, follow along to understand lab structure, attack methodologies, and reasoning behind each setup step.
#### Next Steps:
1. **Download Required Files:** Start gathering necessary files for the lab.
2. **Build the Lab:** Begin setting up virtual machines as per the lab design.
## Downloading Necessary ISOs
Here are the notes summarizing the steps to download the necessary Windows ISOs for the Active Directory lab setup:
### Active Directory Lab: Downloading Windows ISOs
#### Steps to Download ISOs
1. **Access Microsoft Evaluation Center:**
* Search for "Microsoft Evaluation Center" on Google.
* Click on the first link to access the site.
2. **Download Windows 10 Enterprise ISO:**
* Navigate to "Windows 10 Enterprise" and open in a new tab.
* Follow the prompts to download the ISO.
* **License:** 90-day evaluation period. Expired licenses still function for lab purposes (shows a warning but remains usable).
* **File Size:** \~4.6 GB
* **Instructions:**
* Choose the 64-bit version.
* Select English as the language.
* Download and save the file to an appropriate location with sufficient space.
3. **Download Windows Server 2019 ISO:**
* Go to "Windows Server" and select Windows Server 2019.
* **File Size:** \~4.9 GB
* **Instructions:**
* Choose English as the language.
* Download and save the file.
#### Important Notes:
* Both files are large (4.6–4.9 GB), so allow time for downloading.
* Ensure adequate disk space for saving the ISOs.
## Setting Up the Domain Controller
Here are the notes detailing the installation steps for setting up the Windows Server 2019 Domain Controller in the Active Directory lab:
### Windows Server 2019 Domain Controller Setup
#### Step-by-Step Installation
1. **Create Virtual Machine:**
* Open the virtual machine software and click **Create New Virtual Machine**.
* Browse and select the Windows Server 2019 evaluation ISO.
* Configure settings:
* Set OS as **Windows Server 2016** (or similar if 2019 is not listed).
* Select **Standard** installation.
* Choose storage location on your main drive.
* Allocate **60 GB** of storage (split into multiple files).
2. **Configure VM Settings:**
* Uncheck "Power on this virtual machine" and complete setup.
* In **Edit Virtual Machine Settings**:
* Remove **Floppy Drive** to avoid install errors.
* Set **Network** to NAT (shared host IP).
* Assign **2 GB RAM** (or more if available).
3. **Start and Configure Installation:**
* Power on the VM and **press any key** quickly to boot from the ISO.
* Follow prompts to select **language** and **install** Windows Server 2019.
* Choose **Custom Install**, allocate new space, and confirm partitions.
* Proceed with installation (may take several minutes).
4. **Initial Setup After Reboot:**
* After installation and reboot, create an **Administrator password**:
* Use a strong password format (e.g., Password\@123).
* Log in as Administrator and proceed with full-screen setup:
* Go to **Manage** > **Install VMware Tools** for full screen support.
* Install and restart VM as prompted.
5. **Rename Computer for Domain Controller:**
* In **System Settings** > **Rename this PC**, set a relevant name (e.g., Hydra-DC for a Marvel theme).
* Restart the computer after renaming.
6. **Add Active Directory Domain Services (AD DS) Role:**
* Open **Server Manager** and go to **Manage** > **Add Roles and Features**.
* Select **Active Directory Domain Services (AD DS)** and confirm features.
* Proceed with installation and wait for completion.
7. **Promote Server to Domain Controller:**
* In Server Manager, click the **flag icon** and select **Promote this server to a domain controller**.
* Choose **Add a new forest**, set **root domain** (e.g., marvel.local), and set a password.
* Follow prompts and confirm paths for **database, log files, and SYSVOL**.
8. **Finalizing Domain Controller Setup:**
* Click **Install**. The VM will reboot after completion.
* Log back in using the domain (e.g., Marvel\\\\\\\Administrator) to confirm domain integration.
#### Next Steps:
* Set up additional machines to complete the lab environment and prepare for attack simulations.
## Setting Up the User Machines
Here are the notes summarizing the setup of Windows 10 user machines for the Active Directory lab:
### Windows 10 User Machine Setup for Active Directory Lab
#### Objective
* Set up two Windows 10 machines to serve as user machines in the lab environment. These will be used for various attack simulations in the lab.
#### Setup Instructions
1. **Create First Virtual Machine:**
* Open virtual machine software, click **Create New Virtual Machine**.
* Select the Windows 10 ISO downloaded earlier.
* Choose **Windows 10 Enterprise** edition (leave product key blank).
* Set storage to **60 GB**, split into multiple files if preferred.
2. **Edit VM Settings:**
* In **Edit Virtual Machine Settings**:
* Remove **Floppy Drive** to avoid installation issues.
* Set **Network Adapter** to NAT (shared host IP).
* Allocate **2 GB RAM** (adjust as needed based on system resources).
* Save settings and start the VM.
* **Press any key** to boot from the ISO.
3. **Windows Installation Process:**
* Select **language** and **keyboard layout** preferences.
* Choose **Custom Install** and create new partitions as needed.
* Follow on-screen instructions, then allow time for the installation to complete.
4. **Initial Setup After Installation:**
* Configure regional settings and keyboard layout.
* **Local Account Setup**:
* Choose **Domain Join Instead** to bypass Microsoft Account setup.
* Enter a **username** (e.g., Frank Castle for themed setup).
* Set a password (e.g., Password1 for simplicity in the lab).
* Answer security questions as prompted (answers can be placeholders).
5. **Install VMware Tools (Optional):**
* Go to **Player** > **Manage** > **Install VMware Tools** for full screen support.
* Complete the installation and restart the VM if prompted.
6. **Rename the Machine:**
* Open **System Settings** > **Rename this PC**.
* Set a descriptive name (e.g., Punisher for a Marvel-themed lab).
* Restart the machine to apply the new name.
7. **Repeat Process for Second Machine:**
* Create a second VM following the same steps above.
* Choose a different name (e.g., another Marvel character) for distinction.
#### Next Steps
* Once both machines are set up, they will be joined to the Active Directory domain.
* After that, the lab environment will be ready for attack simulations.
## Setting Up Users, Groups and Policies
Here are the notes summarizing the configuration steps for the domain controller, including user creation, policy setup, and enabling a file share:
### Domain Controller Configuration for Active Directory Lab
#### Steps to Configure Domain Controller
1. **Log In to Domain Controller:**
* Use the **Administrator** account with previously set password.
2. **Open Active Directory Users and Computers:**
* Go to **Server Manager** > **Tools** > **Active Directory Users and Computers**.
* Expand marvel.local (domain name) and view Organizational Units (OUs).
3. **Organizational Units (OU) and User Groups:**
* **Create New Group OU:**
* Right-click domain > **New** > **Organizational Unit**, name it **Groups**.
* Move default security groups from **Users** into **Groups** OU.
4. **Create Domain Users and Admin Accounts:**
1. Go in the Users OU, Right click > New > Users
2. **User Accounts**:
* Frank Castle:
* Username: fcastle, Password: Password\@01.
* Disable password expiration.
* Tony Stark (Domain Admin):
* Username: tstark, Password: Password\@01.
* Domain Admin permissions enabled (copied from Administrator).
* Peter Parker:
* Username: pparker, Password: Password\@01.
3. **Service Account (SQL)**:
* Name: SQLService.
* Password: MyPassword123# (noted in description field).
* Assigned Domain Admin privileges (for testing purposes).
*
```
```
5. **Set Up SMB File Share:**
* In **File and Storage Services** > **Shares**:
* Click **Tasks** > **New Share**.
* Choose **SMB Share – Quick** and select C:\\\\\\\ as location.
* Name the share **HackMe** and apply default permissions.
* We can check that it is created
6. **Set Service Principal Name (SPN) for Kerberoasting:**
7. This will be used for Future attacks
8. Open **Command Prompt as Administrator**.
9. Set SPN for SQL service (to simulate vulnerability):
```
setspn -a Hydra-DC/SQLService.MARVEL.local:60111 MARVEL\\SQLService
```
1. Verify SPN setup:
```
setspn -T Marvel.local -Q /
```
1. Confirm SPN registration for Kerberoasting attack later.
2. **Configure Group Policy to Disable Windows Defender:**
* Open **Group Policy Management**:
* Navigate to **Domains** > marvel.local.
* Right-click and **Create a GPO in this domain**, name it **Disable Windows Defender**.
* **Edit GPO Settings**:
* Go to **Computer Configuration** > **Policies** > **Administrative Templates** > **Windows Components** > **Windows Defender Antivirus**.
* Enable **Turn off Windows Defender Antivirus** and apply.
* **Result**:
* Windows Defender will be disabled on all domain-joined user machines to avoid interference during attack exercises.
#### Summary
* The domain controller is now set up with:
* Several user accounts (standard and admin roles).
* An SMB share.
* Policies to disable Windows Defender on domain-joined machines.
* SPN configured for SQL service for future Kerberoasting simulation.
#### Next Steps
* Set up user machines, join them to the domain, and enable file sharing.
* Once complete, the lab will be ready for attack simulations.
## Joining Our Machines to the Domain
Here are the notes for joining Windows 10 user machines to the domain and setting up local admin access for testing in the Active Directory lab:
### Windows 10 User Machine Domain Join and Local Admin Configuration
#### Overview
Join the Windows 10 machines (e.g., Frank Castle’s and Peter Parker’s) to the marvel.local domain, set up network shares, and configure local administrator rights.
#### Steps to Join Windows 10 Machines to Domain
1. **Create Shared Folder on User Machine:**
* Go to This PC > C:\\\\\\\\.
* Right-click > **New Folder**, name it **Share**.
* Right-click folder > **Properties** > **Sharing**.
* Click **Share** and turn on **Network Discovery and File Sharing** for public networks.
2. **Get Domain Controller IP Address:**
1. On the domain controller, open **Command Prompt** and type:
```
ipconfig
```
* Note the IP address of the domain controller (e.g., 192.168.57.140).
* **Set DNS Server to Domain Controller IP:**
* On the user machine, go to **Network and Internet Settings** > **Change Adapter Options**.
* Right-click **Ethernet 0** > **Properties** > **IPv4**.
* Set **DNS Server** to the domain controller's IP address (e.g., 192.168.57.140).
* Leave **IP Address** set to obtain automatically (DHCP).
* **Join Machine to Domain:**
* Go to **Settings** > **System** > **About**.
* Select **Access Work or School** > **Connect**.
* Choose **Join this device to a local Active Directory domain**.
* Enter **Domain Name**: marvel.local.
* Sign in with **Domain Admin Credentials** (e.g., Administrator and password).
* Restart the machine when prompted.
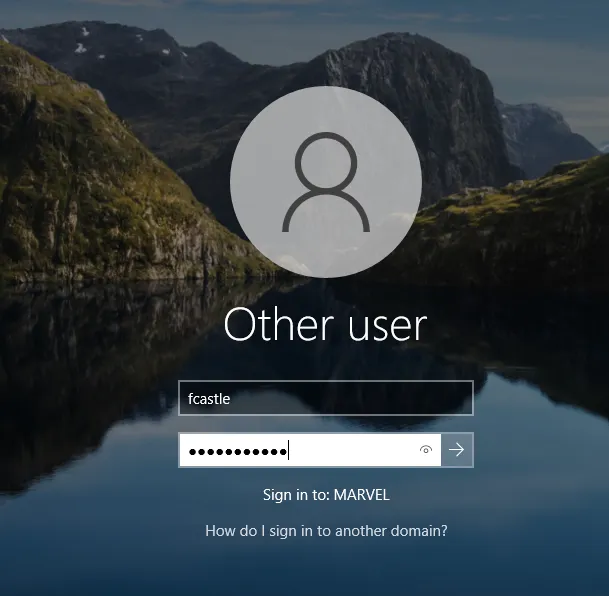
* **Log in as Domain User:**
* After reboot, log in as the domain user (e.g., fcastle with Password1).
#### Configure Local Administrator Rights
1. **Set Frank Castle as Local Admin on his Machine (The Punisher):**
* Log in as Domain Administrator on **The Punisher** machine.
* Open **Computer Management** > **Local Users and Groups** > **Groups** > **Administrators**.
* Add fcastle as a local administrator.
2. **Set Frank Castle as Local Admin on Tony Stark’s Machine (IronMan):**
* Repeat steps to log in as administrator on IronMan.
* Add fcastle to the local administrators group on **Spider-Man**.
* Also, add tstark as a local administrator on IronMan for his own access.
3. **Verify Domain Join in Active Directory:**
* Go back to the domain controller, open **Active Directory Users and Computers**.
* Confirm **The Punisher** and **Spider-Man** appear under **Computers** in the marvel.local domain.
#### Summary
* Frank Castle (fcastle) is a local admin on **The Punisher** and IronMan.
* Tony Start (pparker) is a local admin on Iron-Man.
* Network shares are set up on each machine to emulate a realistic network.
* Machines are joined to marvel.local and ready for attack simulations.