# Creating Share Folders on Server Manager

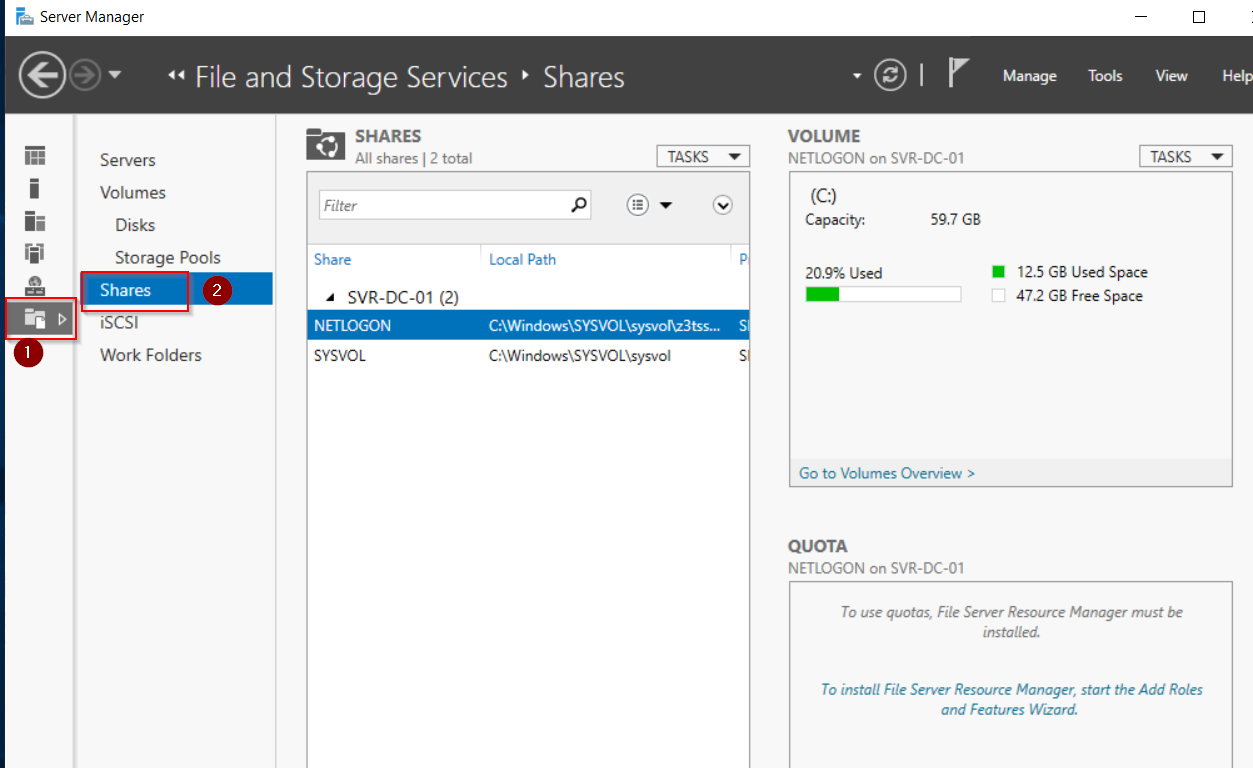
1. Open Server Manager&#x20;
2. Click on File and Storage Devices&#x20;

<figure><img src="https://3367244783-files.gitbook.io/~/files/v0/b/gitbook-x-prod.appspot.com/o/spaces%2FK3YP1U2Fck03eUZ2XijJ%2Fuploads%2F4FooiOxKp96KQ8YpPBY8%2Fimage.png?alt=media&#x26;token=374112b9-9e03-438c-8d05-514fdb8ff6c0" alt=""><figcaption></figcaption></figure>

3. Click on Shares&#x20;

<figure><img src="https://3367244783-files.gitbook.io/~/files/v0/b/gitbook-x-prod.appspot.com/o/spaces%2FK3YP1U2Fck03eUZ2XijJ%2Fuploads%2FEpxn5rjS0OEm2Wd867rJ%2Fimage.png?alt=media&#x26;token=6a7ac852-6027-4059-b391-ec6d45925a46" alt=""><figcaption></figcaption></figure>

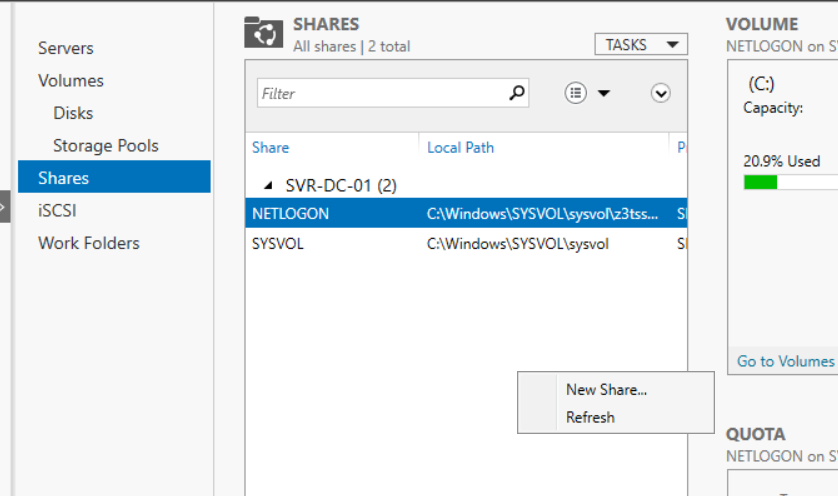
4. Right click in the share section and select > New Share

<figure><img src="https://3367244783-files.gitbook.io/~/files/v0/b/gitbook-x-prod.appspot.com/o/spaces%2FK3YP1U2Fck03eUZ2XijJ%2Fuploads%2FOeDl5HkcmyJAW75ViiCs%2Fimage.png?alt=media&#x26;token=7ffb9a44-7b33-43c4-9a60-8912b6a3c83e" alt=""><figcaption></figcaption></figure>

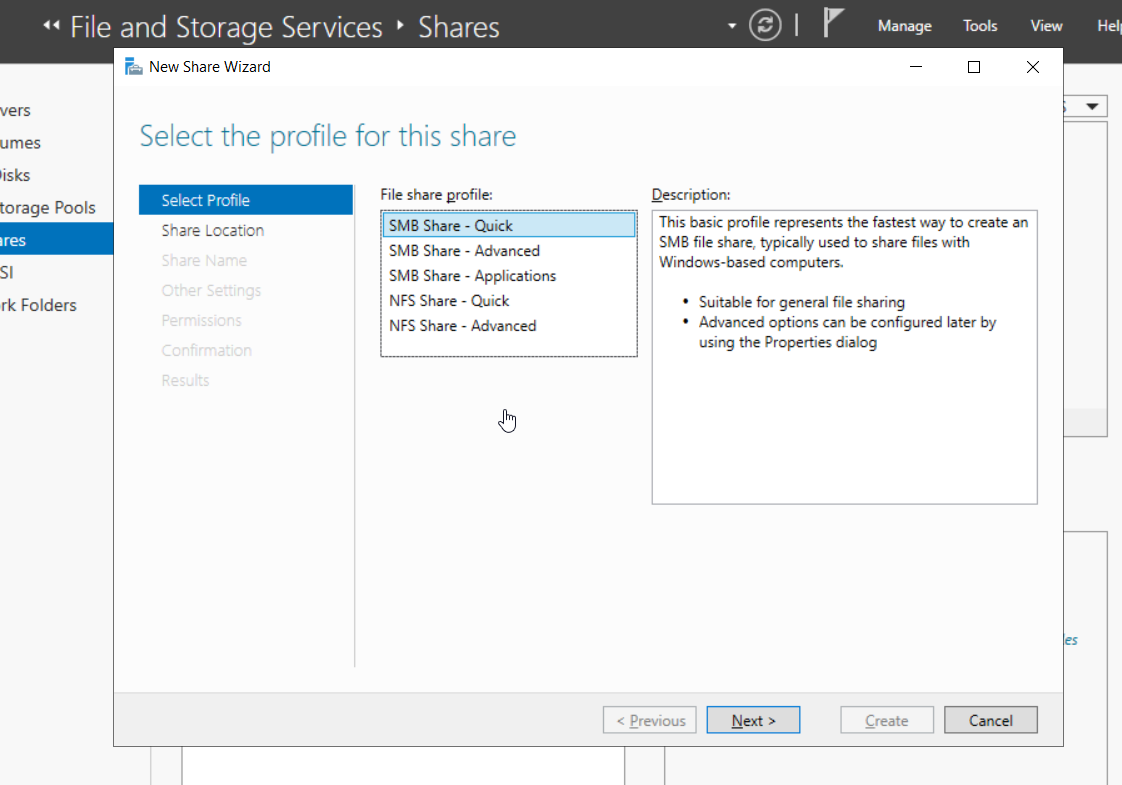
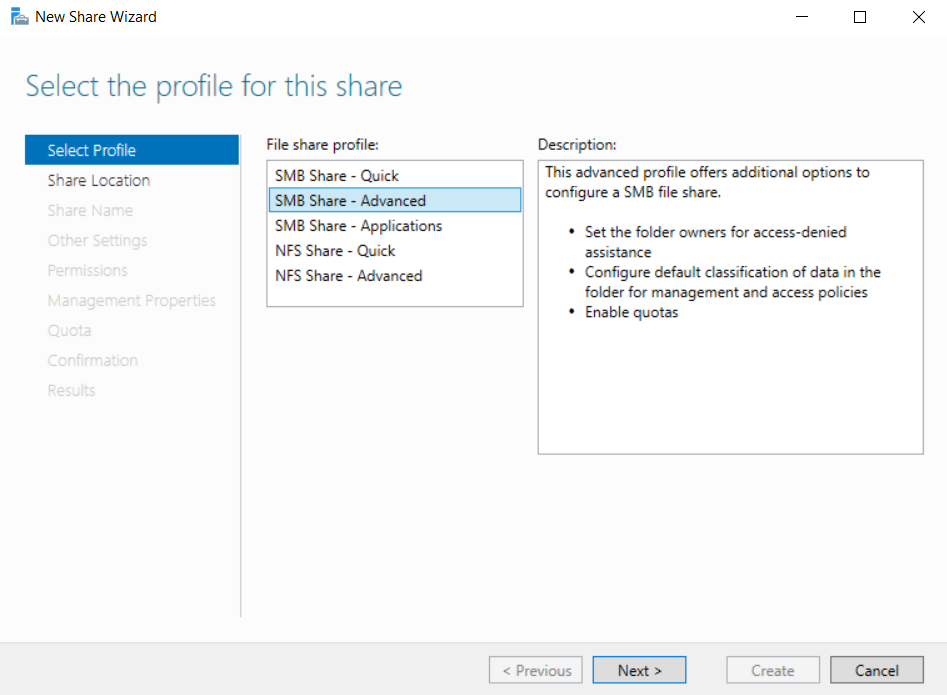
5. Select the type of share that you want to create

<figure><img src="https://3367244783-files.gitbook.io/~/files/v0/b/gitbook-x-prod.appspot.com/o/spaces%2FK3YP1U2Fck03eUZ2XijJ%2Fuploads%2FCmLftNqStThy53EkjaWt%2Fimage.png?alt=media&#x26;token=2b6c843f-9102-4cbf-947a-c9617642e8ef" alt=""><figcaption></figcaption></figure>

6. ![](https://3367244783-files.gitbook.io/~/files/v0/b/gitbook-x-prod.appspot.com/o/spaces%2FK3YP1U2Fck03eUZ2XijJ%2Fuploads%2FZD8Rg2dtkx8Dt8K0PQPL%2Fimage.png?alt=media\&token=2e91b112-8113-4ca3-9e79-90e2fb903fad)

   1. To proceed with this share type&#x20;
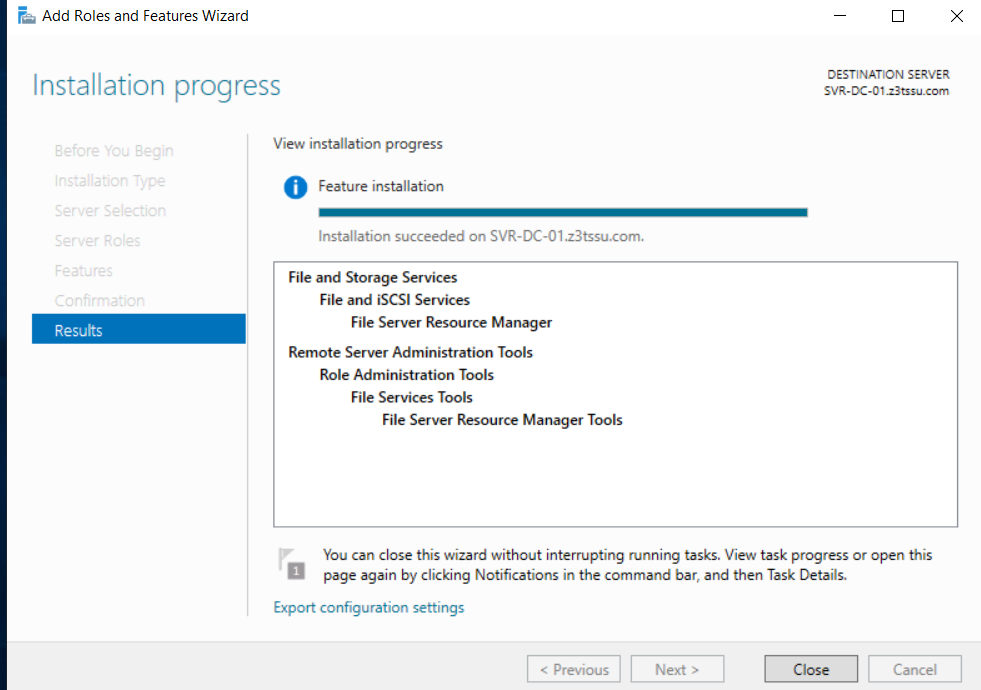
   2. You will need to go back to roles and features and install the File Server Resource Manager under File and Storage Services&#x20;

   <figure><img src="https://3367244783-files.gitbook.io/~/files/v0/b/gitbook-x-prod.appspot.com/o/spaces%2FK3YP1U2Fck03eUZ2XijJ%2Fuploads%2FT5dvy1b30UBOEFuV8kI0%2Fimage.png?alt=media&#x26;token=6a051104-6177-45e3-8a8e-df912a87eec3" alt=""><figcaption></figcaption></figure>
7. If you go back to file and sorage services and create a new ile share advanced, you will be able to

<figure><img src="https://3367244783-files.gitbook.io/~/files/v0/b/gitbook-x-prod.appspot.com/o/spaces%2FK3YP1U2Fck03eUZ2XijJ%2Fuploads%2FpGvP71Kh5mQxOg1EuJ0D%2Fimage.png?alt=media&#x26;token=3007726f-bdbf-4e53-a6ee-716045da2c18" alt=""><figcaption></figcaption></figure>

8. Select the share location
9. Select the share name&#x20;
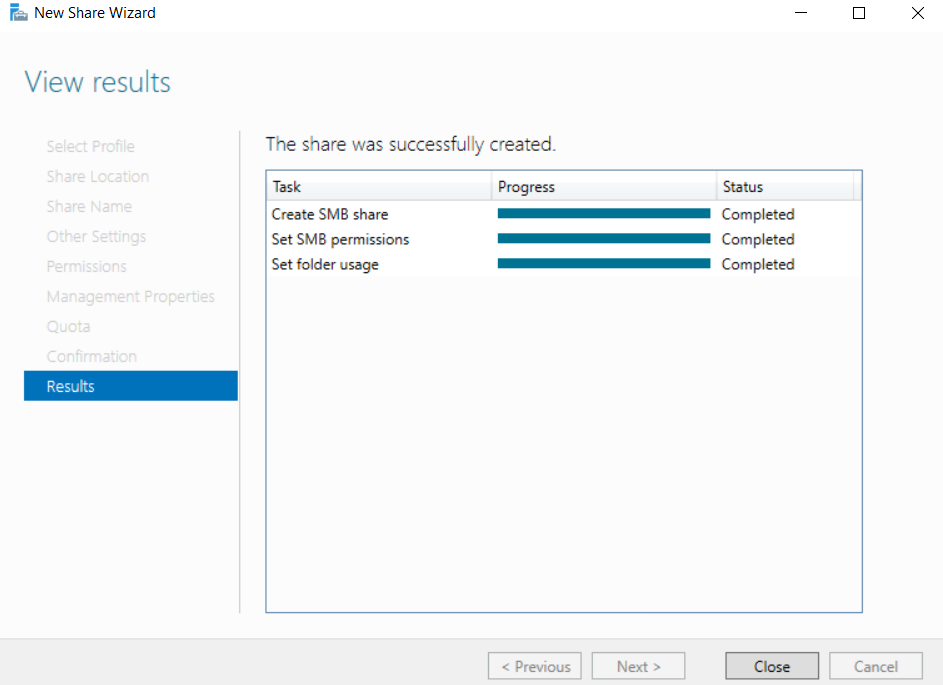
10. Go through the process and press create&#x20;

<figure><img src="https://3367244783-files.gitbook.io/~/files/v0/b/gitbook-x-prod.appspot.com/o/spaces%2FK3YP1U2Fck03eUZ2XijJ%2Fuploads%2FTCT1s0mukb3TBXuak3bn%2Fimage.png?alt=media&#x26;token=a41ecd52-1ae2-42c7-9320-9fc0c6040809" alt=""><figcaption></figcaption></figure>

11. the new share should now be available&#x20;
